Drawing realistic eyes is a fun challenge for artists at any level. Eyes carry emotion, depth, and life into any sketch. But capturing both eyes with the same shape, expression, and proportion can feel tricky-especially for beginners.
With a structured process and some patience, anyone can master this essential portrait skill. This guide breaks it down into clear, manageable steps, mixing easy tips and visual alignment methods. You’ll also discover how grid drawing can save time and improve symmetry.
Materials You’ll Need Before You Start
You don’t need fancy tools to begin. Just grab these simple materials:
- A smooth sheet of drawing paper
- HB and 2B pencils for light and dark shading
- An eraser and a sharpener
- A blending tool like a tissue or cotton swab
- A ruler or grid drawing aid (digital or paper-based)
These tools will help you stay consistent, especially when you’re drawing two eyes with equal detail.
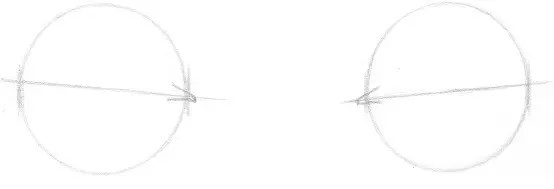
Step 1: Outline the Basic Eye Shapes
Start by lightly sketching the overall eye shape using soft pencil strokes.
- Draw two almond-shaped outlines side by side
- Maintain equal spacing between both eyes
- Keep the size and angles balanced
- Use a ruler or sketch over a grid to improve alignment
- Draw a faint horizontal guideline through both eye shapes for symmetry
Don’t worry about perfection – this stage is all about planning.
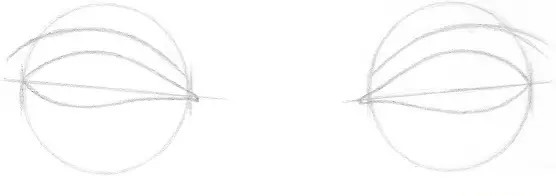
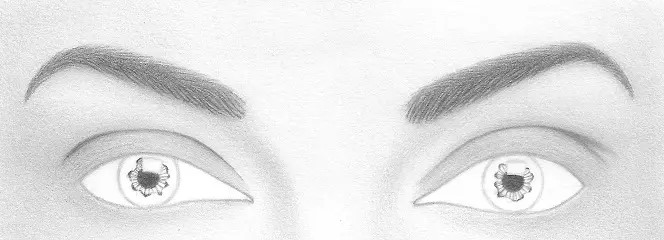
Step 2: Add the Iris and Pupil
Once you’re happy with the shape, draw the circular iris inside each eye.
- Sketch the iris as a near-perfect circle
- Make sure it slightly touches the top and bottom eyelid
- Inside the iris, draw a smaller circle for the pupil
- Leave a small white spot to represent light reflection
- Repeat on the second eye, keeping both sides even
This step sets the stage for more lifelike shading later.
Step 3: Sketch the Eyelids and Tear Ducts
Your eyes need upper and lower eyelids to look natural.
- Curve a soft line above each eye to create the upper eyelid
- Do the same under the eye for the lower lid
- Add small corners near the nose for the tear ducts
- Use light pencil pressure for subtle lines
Now your drawing starts to take shape as a real portrait drawing.
Step 4: Lightly Add Eyelashes and Eyebrows
These details bring character and expression to your eyes.
- Draw the eyebrows above the eye using short, quick strokes
- Add soft eyelashes pointing upward and outward on the top eyelid
- Draw fewer and shorter lashes on the lower lid
- Vary their length slightly to keep it natural
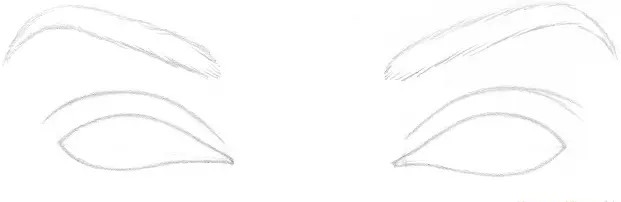
Take your time here. Realism depends on these small additions.
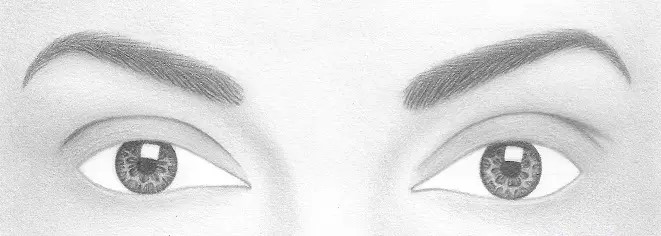
Step 5: Begin Shading the Iris
Start adding tone to the iris to give the eyes more depth.
- Use a circular motion to shade the iris
- Keep the pupil dark and the iris mid-toned
- Add fine lines that radiate outward from the pupil
- Avoid over-blending to keep texture visible
- Always preserve the highlight for a lifelike effect
This is where your drawing begins to come alive.
Step 6: Add Realistic Shadows Around the Eye
Light and shadow give volume to your sketch.
- Shade under the upper eyelid to create a soft shadow
- Add shading to the whites of the eye where shadows fall
- Slightly darken the corners near the tear duct
- Use a blending tool to smooth out rough pencil strokes
Avoid making the eyeball too dark – it should stay bright in the center.
Step 7: Define Eyelids and Add Skin Texture
Now it’s time to deepen the surrounding features and refine shapes.
- Add darker tones to the crease above each eyelid
- Use gentle shading between the brow and eyelid
- Draw faint skin texture around the eyes using tiny, circular strokes
- Slightly darken under the lower eyelid to add depth
These subtle shadows create a realistic skin feel.
Step 8: Final Highlights and Polish
Make your drawing stand out by sharpening key areas.
- Deepen the pupil and edges of the iris
- Add sharper eyelashes with darker lines
- Gently erase small highlight spots where needed
- Refine outlines for clean edges
- Check both eyes for proportion and alignment
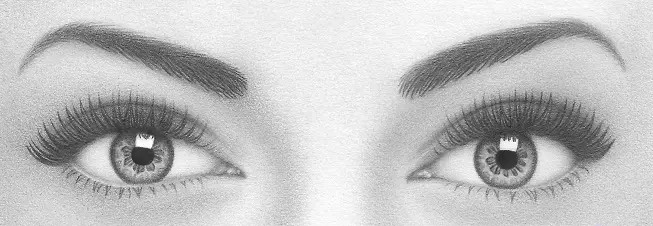
When you’re happy with the balance, your drawing is complete!
Extra Tip: Use a Grid to Improve Eye Symmetry
Drawing both eyes symmetrically is hard without help. That’s where grid drawing can truly help:
- Divide your paper into equal squares
- Place each part of the eye in its correct square
- This keeps sizes and angles consistent
- Helps with placing highlights, shadows, and pupils
You can learn more about how grids create depth by checking our earlier blog: Create Depth and Realism in Your Drawings
Bring Realism Into Focus
Drawing a pair of realistic eyes may seem intimidating, but it’s all about patience and structure. As you break it down into steps, you’ll feel more confident in your sketching. Each step adds detail, and each line helps create life.
Using tools like a reference image, a grid system, or even a photo to line drawing approach can simplify tricky areas. As you repeat the process, your style will naturally evolve.
If you’re looking for an easy way to add precision to your sketches, consider using GridSketcher. It transforms images into sketch-ready formats and helps you align proportions using grids. It’s especially useful for beginners and portrait artists who want to improve accuracy without stress.
